|
|
Do you have a great mallet?
I mean a mallet you can get ugly with and pound brutally with wild abandon? Sculpting and outright medium duty timber framing? Takes a lick'n and keeps on tickin?
|
|
Well, I didn't.
Oh, I've had mallets. Must have made a dozen of them over the years. All eventually failed but one.
They were either too light or they would crack or get beat up too soon. I tried all the local woods one after the other. Nothing would really hold up.
Finally, in desperation, I cut disks from some commercial plywood flooring and glued them up with small bolts (electric motor bolts the long thin kind) set in to keep them all together. The through hickory handle was drilled out to take some poured lead up top for more weight and I made a leather tab/hanger to be able to hang it up so's I could find it easier. Good mallet, it's served me well for the last decade.
|
|
But it wasn't heavy enough for some tasks and I didn't exactly feel great about brutish work with it.
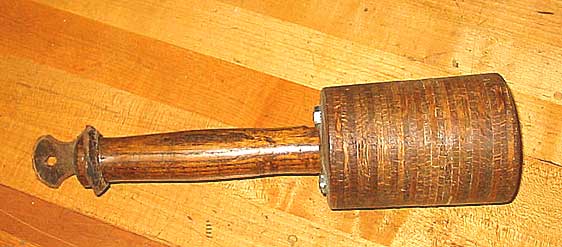
Well...............Roy Griggs put a bug in my ear with a picture of an antique mallet. It was a pip using hard sole leather for it's stuffing. No way am I finding a big fat stash of sole leather nearby and cheap though.
So, I let the idea lay at the back of my brain for a few days.
Now, here comes the part of the tale that some of you are not going to like much.
The truth is, there is only so much you can get from the big box Borgs. They sell a lot of stuff but the selection isn't exactly endless. The quality is passable in some instances and it isn't passable in others. If everything you do has to come off the shelf from the Borg, you lead a Home Depot life.
I'm terribly sorry, but that's how it is.
If you want more than this, you pay for real. You wait like a hungry spider for just the perfect materials to surface. You keep your eyes peeled and scrounge wherever you go and whatever you see.
And you prepare yourself to work for it, when the materials do show up. Because pre made and pre finished are not so likely to appear.
Well, I was scrounging material when what should appear? But a scrap of "pipe blind" In industry sometimes you need to temporarily blind off big pipes for maintenance and such, so they make reinforced plastic materials for this job. This particular stuff is poly based with linen cloth layers so it's amazing strong but not terrible hard. I suspect it will last and last but not beat up my mortise chisel handles much.
First order of business was getting some disks. I used a hole saw and a heavy 1/2" drill and it tossed me around like an angry little girl with a rag doll, but it worked.
|
Next of course was to make the holes bigger to stack over the central rod of the mallet. I used a forstner bit and it cut well, but it was a lousy choice. Next time I'll regrind a spade bit with edge flutes to work like a Forstner somewhat, but have the center point be a lot bigger to center the bit over the holesaw pilot hole better. This will get the holes in the center of the disks a lot better and make it easier to turn it true in the end.
|
 Rounding
up hardware was next. It happens that the cross arms on medium sized
power poles use 5/8" threaded rod. This is plenty beefy and the price is
right. This is something you can also buy at most any large hardware but
the cost takes some of the fun out of the project. Also shown are some
huge flange washers from bridge construction and the big thick square
washers from the same power pole cross arms. Plus nuts to fit, both
square and hex. I took a hack saw and cut the flat nuts in 1/2 for top nuts.
They're still plenty strong and with the 5/8" rod and thick washers etc,
there is no need for more weight in the mallet. Rounding
up hardware was next. It happens that the cross arms on medium sized
power poles use 5/8" threaded rod. This is plenty beefy and the price is
right. This is something you can also buy at most any large hardware but
the cost takes some of the fun out of the project. Also shown are some
huge flange washers from bridge construction and the big thick square
washers from the same power pole cross arms. Plus nuts to fit, both
square and hex. I took a hack saw and cut the flat nuts in 1/2 for top nuts.
They're still plenty strong and with the 5/8" rod and thick washers etc,
there is no need for more weight in the mallet. |
Some Light Machining
I have a little lathe. I love it. For this job a good wood lathe would do as long as you can slow down the speed enough and have a 3 jaw chuck to center round stock with. My wood lathe is a mangy dog of a lathe which is barely passable for woodwork, forget metal work on it.
So, I divvied up the disks I'd cut into three piles, for the three mallets and measured, then cut, the threaded rod. The only reason I needed the lathe at all, besides final turning of the plastic to shape, was to center drill one end of the big rod to be threaded to take the small rod for the handle and start the tap square too. Drilling anything on end and perfectly centered and square to the host metal requires a lathe. On a lathe the hole -wants- to drill in the center and up the axis. Any other way, anything at all, and you are fighting it every minute. It's completely possible to start a hand tap by eye and have your threads along the axis you want, but it's safer to use a fixture and no worry you'll get them cattywhompus, or wonky (for my British influenced pals).
Here is my lathe, and the place in the shop where it lives (under canvas most of the time) just for a gloat.
It's not so impressive a lathe, being merely a flat bed Atlas, but the spare parts and accessories I got with it weigh much more than the lathe itself and in metal work the spare tooling and parts are always harder to find than the parent lathe. This one came equipped with pretty much everything made for it.
|
|
The heavy allthread being end drilled and tapped, it was time to assemble the parts and turn to shape. I turned the plastic in the lathe. When it was suitably true I wanted to paint the hardware a uniform black and taped off the poly. Gave it a good shot and dried well. It's not the sturdiest paint, ordinary Rustoleum. But it will hold up pretty decent and look well loved when it does start to go. Besides not that much of it shows anyway.
|
|
Here it is after the tape came off.
|
|
I chose rosewood for the handles. Any hard tough beautiful wood will do, but there's something about genuine rosewood that says fine tool to me, every time. I turned them on my regular wood lathe between centers, leaving a short cylinder of scrap on the end. Unless you are better than me, you always have a bit of scrap left on the ends of a spindle turning anyway. Before cutting this off !! I transferred to the metal lathe and bored a hole for the handle rod all the way through. You can do this on a wood lathe too if you figure a way to center and hold the "plug" you are leaving on one end of the handle. A simple scrap mounted to a faceplate and bored for the plug will do it. They make end drilling bits just for this job but they don't exactly give them away I tell you. I have to turn my face and squint at the catalog out the side of my eyes to even be able to see the prices they usually ask! Yikes, I'm never going to have any. In the metal lathe, an ordinary long bit, approached from each end to the middle, gets you close enough to perfect center boring.
I like my mallets to be able to stand on their end so they don't roll away on you and I also like to be able to hang them up, so I added a ring.
I put screweyes in over top of my favorite window so they always hang in ever-so-plain sight. Nothing worse than searching for your mallet
|
|
 Mallet
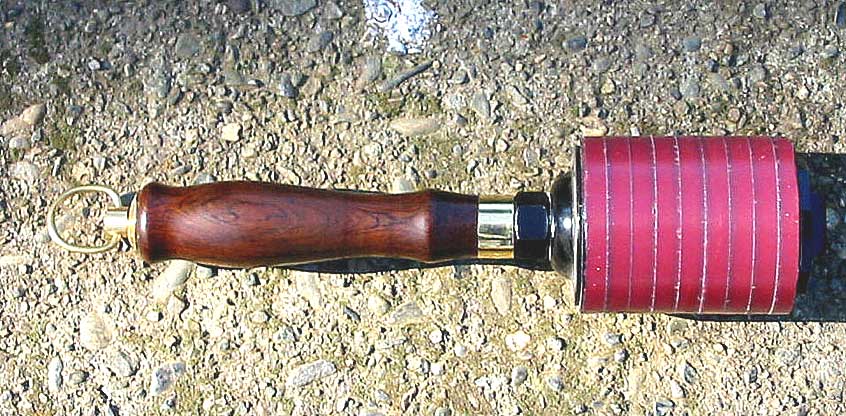
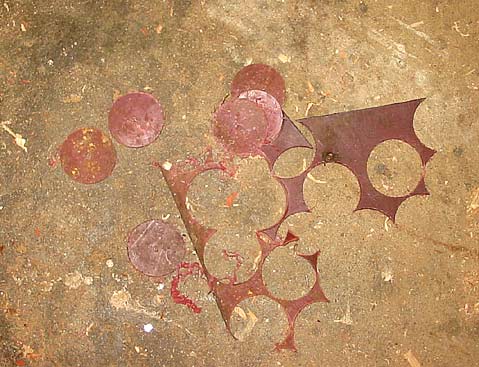 Here
are the disks cut out and some of the waste
material from the in between. You just do your best not to waste any
more than you have to.
Here
are the disks cut out and some of the waste
material from the in between. You just do your best not to waste any
more than you have to.