 Fix That Tote
 August and Most Serious Galoots

     The following is a most sincere invitation to a better life for you.
      So, tell me, Galoots young and old....
How many times have you passed on a good plane just because the tote was
chipped?
Tired of all those chipped totes you already have in your life are you?
Suffering from sleepless nights while your skin is flaking like snow and
your nerves are shot to smithereens from one more great tool you had to walk
past because the tote was chipped?
 You think you can't fix it?  Think it's too hard and you'll never get a
good job and it'll stick out like a sore thumb from 55 yards away?  Well
fret no more!
 Have we got the cure for you!  A secret good men have died to protect.
The very miracle of the age. Passed down hand to mouth by the secret fakirs
of ancient legend, simple and perfect everytime.
And..........   If you act now we'll throw in, completely free and
without further obligation, for only the price of postage or a good mellow
drink, whichever is cheaper.................
 Now, who will be the first?     Step right up, don't be shy
|
 |
|
Only one in 3planes out there in the wild escape the chipped tote horn. At the swap meet or yard sale or ebay it makes most of the difference between a $5 plane and a $50 plane. You know the story. You see a great plane and there you are wondering if you should take it or let it go. Most will just leave it be because finding a good original tote can cost about as much as another whole plane with a perfect tote and it takes time to find even a single one. Replacement newly made totes are available but again these cost about as much as the plane you were thinking of putting them on many times. And about 75% of the time it's the tote tip that is chipped or missing in action. We've all seen it and passed them by about a million times mostly just for this defect alone. But fixing them is easy! Easy I say. The trick is cutting off the offending area parallel with the bottom. If the cleanup cut is made any old place you can't get a clamp on it. Without a clamp your repair is going to stick out like a sore thumb from 50 yards and probably fall back off in a year or two. When it's parallel any vise or sturdy clamp will give you plenty of pressure to make a tight permanent glue joint. It's why clamps were invented.
There are other ways of squaring up your gluing surface, I know, but the easiest and fastest for me is shown here.
|
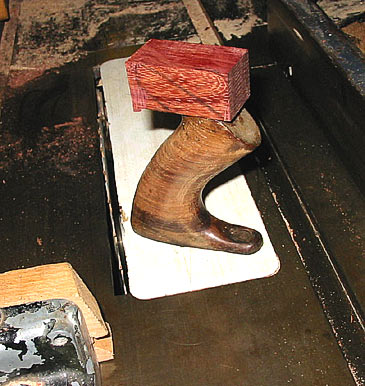
 This is an ordinary table saw rip fence with the tote being cut. A good sharp fine tooth blade and a slow easy feed does it here. This results in a smooth flat surface parallel to the base.
Next, pick through your scraps for a nice grain match in rosewood. If you have a different species of rosewood that's ok, you can stain to match easy later, just try to line up the grain lines.
This is a scrap of purpleheart I just grabbed and placed on top.
|
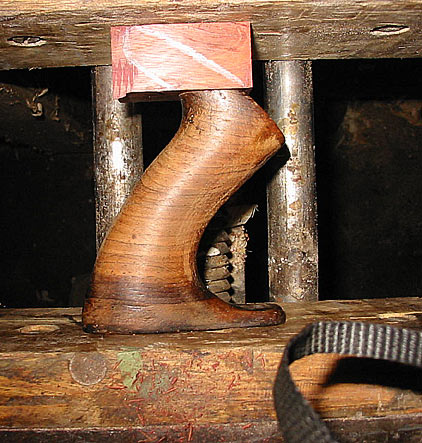
You'll want to be sure to select your repair piece oversized. Longer, wider and thicker if you can. Make the horn longer and especially watch the curve up the back. It'll look larger than it really is at first. Once you start to round this off it begins to look differently, so leave extra. I realize this picture makes it look like I marked out for minimal but trust me it's considerable bigger than it looks. See what I mean about not trusting your eyes?
Of course you will be grain matching rosewood instead of purpleheart. I just wanted it so show up for the picture.
|
|
I've read many accounts of gluing rosewood.
I've tried lots of different types of glue too. One school says you need to remove the natural oil present and I've used acetone for that. I've even taken the point of a scratch awl and scratched up the gluing surfaces taking care not to go beyond the finish lines. I did this for years and used epoxy or polyurethane glue. Gradually I started to use less and less of this extreme precaution though. These days I simply use ordinary yellow carpenters wood glue available anywhere. After 24 hours in the vise I cannot break the bond with my hands alone, even pressing between my knees, so I figure that's good enough for the girls I know. I've never had one fail on me. It's the smooth gluing surface and even clamping pressure that seems to do it.
Once it's cured well
Take it out of the vise and give it a good tug. Really try to break it. You'll see, you can't.
OK, weightlifters and guys who can pull 26 loaded semi trucks down the road with a rope in their teeth might be excused from this part. But a good strong average pull is my point. It'll hold.
Carve it to shape.
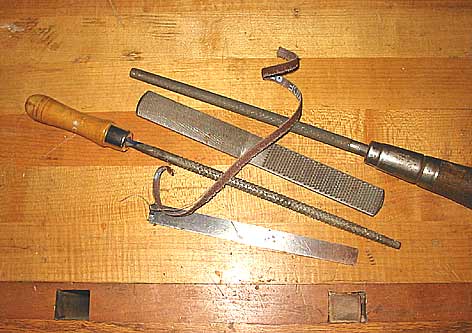
I will use round rasps and files. I especially like the small 6" shoe rasp with fine rasp teeth and coarse file teeth, both flat and 1/2 round. When these are sharp they are just a joy.
Next comes a scraper. I like them thin, narrow and flexible for curved work like this. There is another article on making the flexy scrapers on this site.
|
|
Finishing
After scraping it's possible you'll need to sand it some. I'll use strips of belt sander belt, ripped into narrow strips and applied shoeshine style. My final sanding never goes past 220.
After sanding I polish rosewood and anything harder than that. A med sewed cotton buffing wheel, turning around 1000 rpm and med aluminum oxide polish will make it sparkle in minutes. Once you've buffed rosewood you'll never go back to any other kind of finish. It looks great, feels like warm buttah against your skin and if you need to renew it for some reason it only takes 5 minutes more.
Staining
In case your rosewood patch didn't quite match for color, I've found an interesting thing. Minwax Jocabean stain, a deep muddy brownish black color, usually always brings the tone right close to Indian rosewood. Even on the lighter rosewoods like Bolivian the color match is spot on. It's the grain pattern you need to watch when aligning the patch. After that the color is easy.
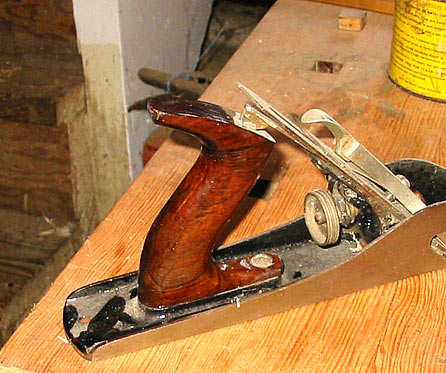
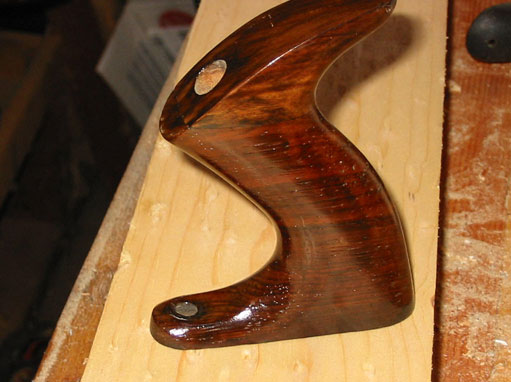
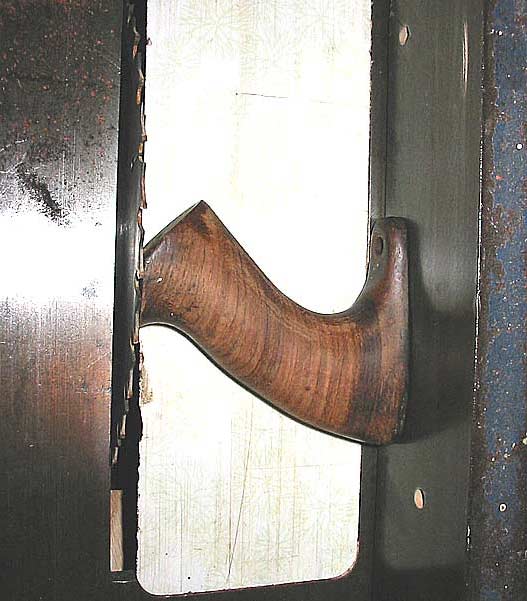
Both these totes were repaired using this method.
yours Scott
|
|
|
|